A vase from a profile
What you have: nothing — an empty project. What you want: a vase, modelled from scratch: a profile turned into a body of revolution, refined with real mesh edits, made into a small shelf of vases with a mirror and an array modifier, and given a glazed material.
Where case 1 started from a scan, this one starts from a curve you draw yourself. It exercises the profile editor (screen 09), the mesh-edit tools (extrude, loop cut), a modal move constrained by a numeric snap, the "last operation" card, the modifier stack (mirror, array), and the material panel with a texture slot — the tools that turn an empty project into a real object rather than an imported one.
1. Draw the profile
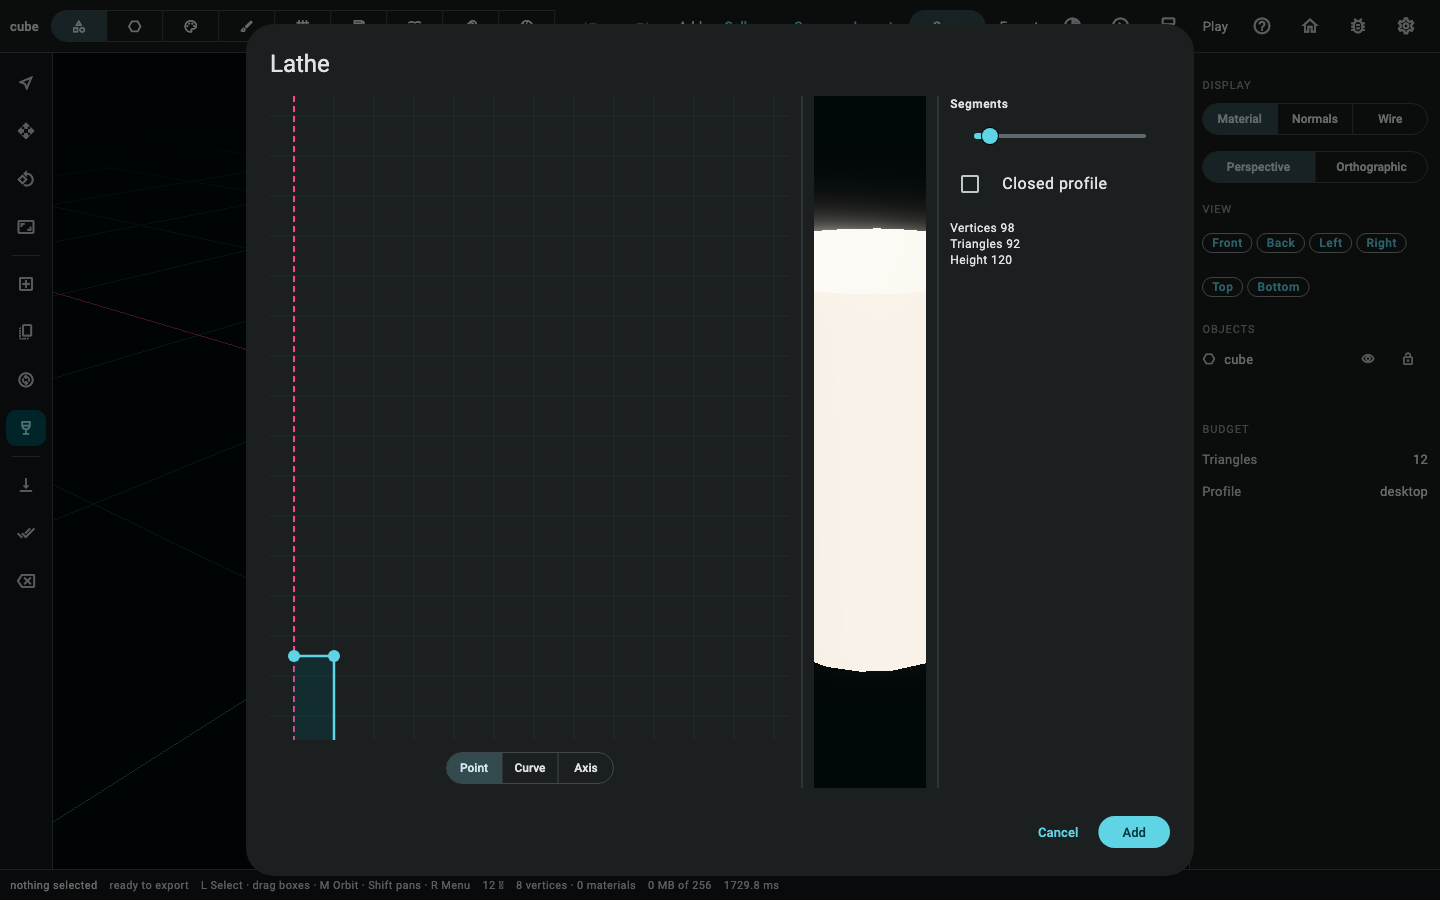
New project, then the lathe tool. The profile editor is a 2D canvas — radius across, height up — where each click drops a point; the curve those points describe, turned a full circle round the height axis, is the surface.
This vase's own profile: starts on the axis (radius 0, so the base is a single point rather than a flat disc with a hole), flares out to a belly, waists in, flares again at the shoulder, and narrows to an open neck — eight points, turned in 12 segments:
(0.00, 0.00)  (0.32, 0.00)  (0.38, 0.12)  (0.34, 0.32)
          (0.22, 0.50)  (0.30, 0.72)  (0.24, 0.92)  (0.26, 1.00)
At the command layer this is one call: AddLathe(profile: …, segments: 12, shapeName: "vase"). The status line answers "add a vase — object 1" —
the same sentence AddLathe.says gives regardless of what the profile
looks like, because the word is whatever the shape editor's own name field
says at the time.
Twelve segments is a parameter, not a mesh yet — AddLathe builds a
ParametricGeometry, and the operation card (below) can still change the
segment count without starting over. Extrude and loop cut need real
topology, so the next step converts it: Convert to mesh, which answers
"convert to a mesh — object 1". This is one-way, the same as it is for
a primitive — undo puts the parametric lathe back, but there is no command
that turns an edited mesh back into one.
2. Flare the rim
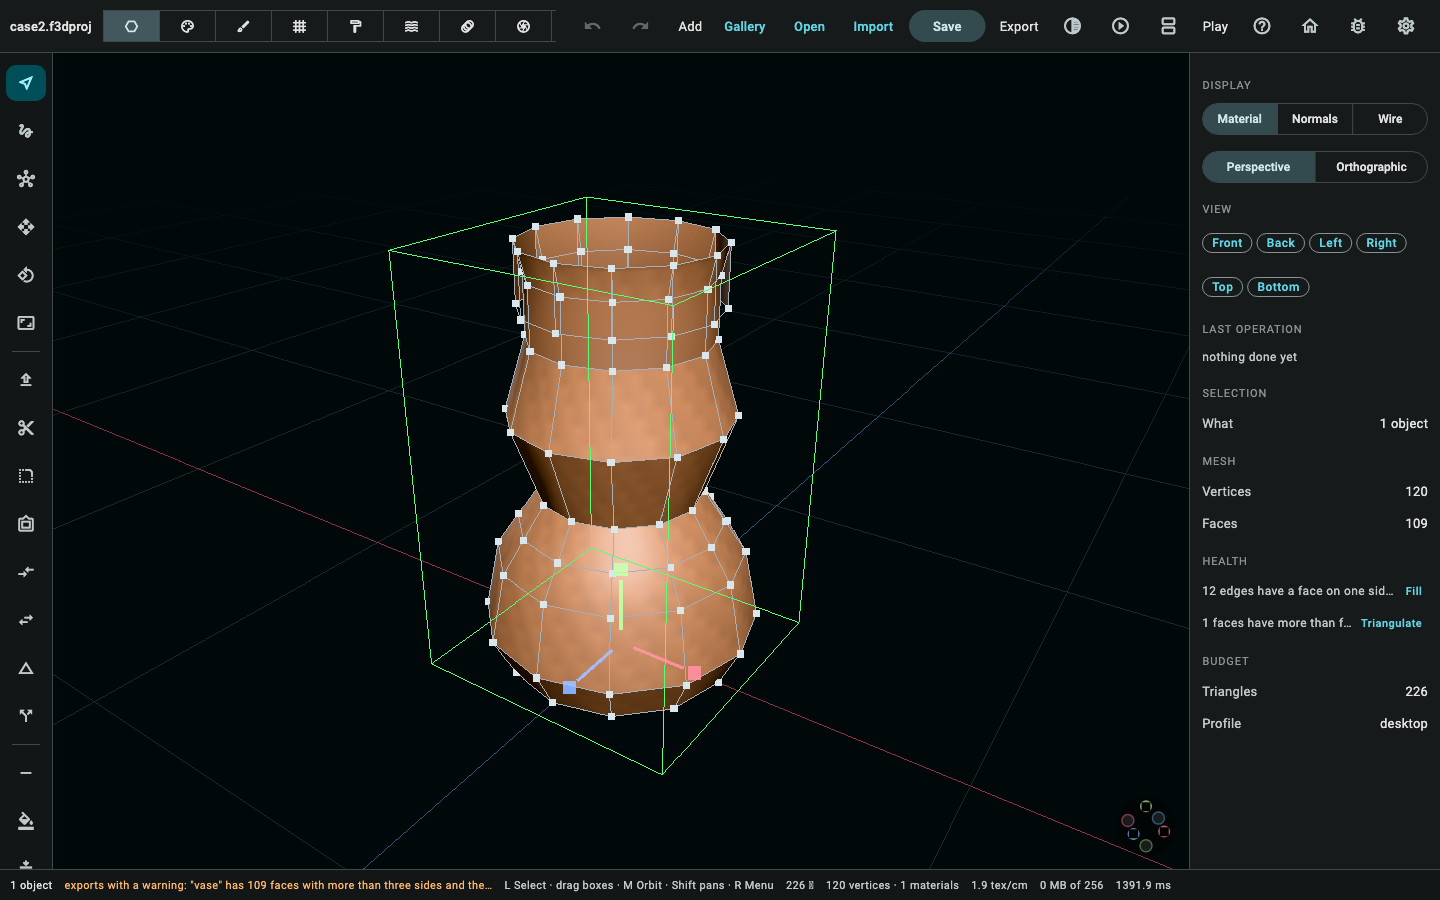
Switch to edit mode, face select, and pick the topmost ring — the twelve faces that make up the vase's open neck. The status line shows the selection: "object 1, faces 61, 62, 63, 64, 65, 66, 67, 68, 69, 70, 71, 72".
Press E (extrude) and pull outward: Extrude(distance: 0.04) answers
"extrude — object 1, faces 61, …, 72" — the same twelve faces, now
sitting 4 cm further out along their own normals, which is a lip rather
than a straight-sided tube.
3. A modal move, snapped
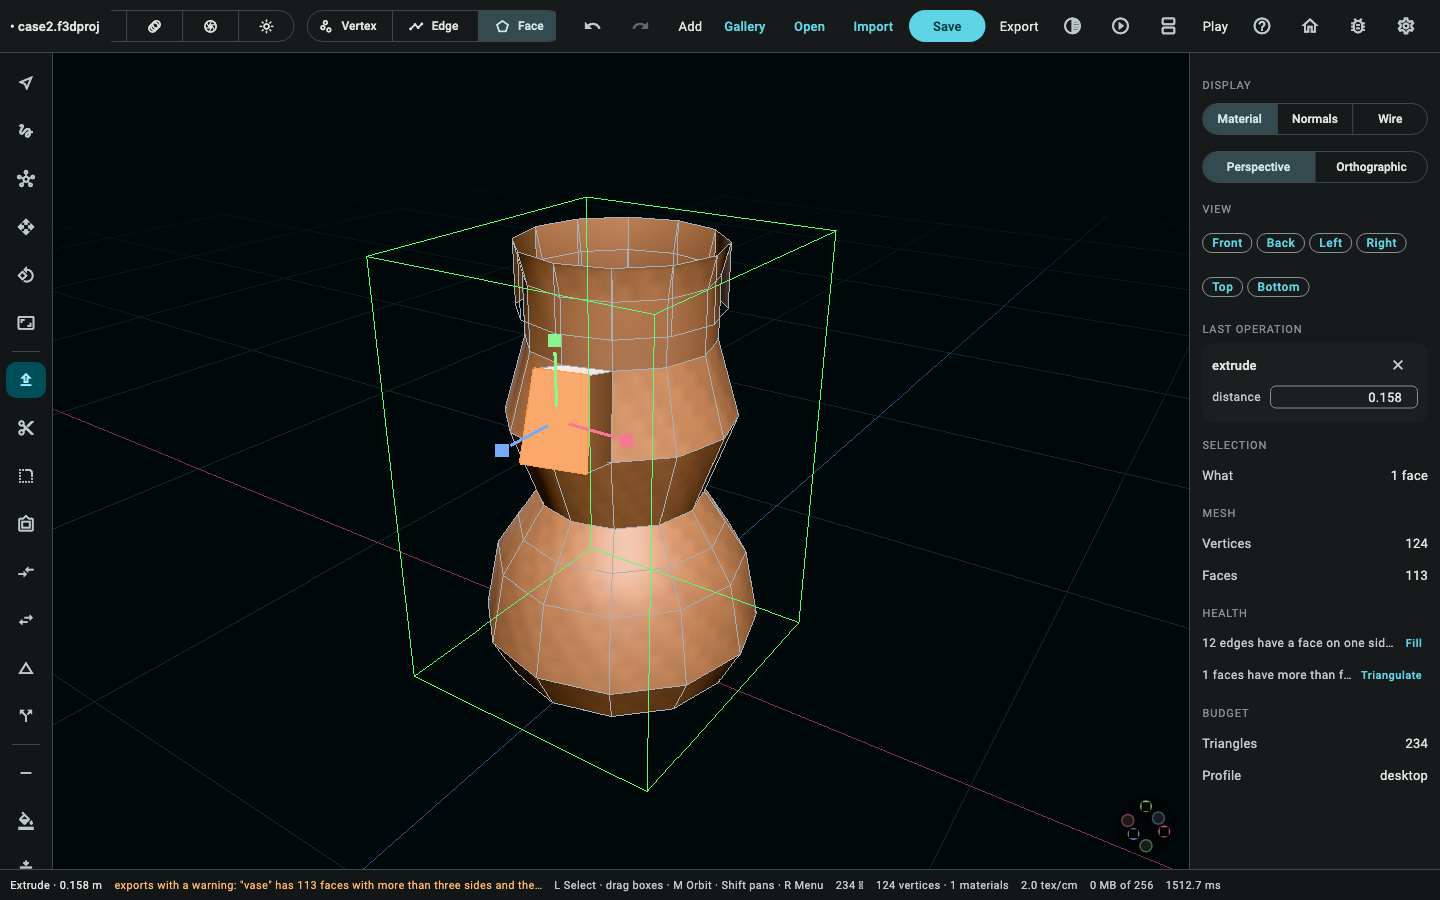
The extruded lip is still selected. Press G to move it, drag upward,
and hold the snap modifier: the drag reads 0.23 m off the pointer, and with
snap held it rounds to the nearest tenth of a metre —
TransformModal._snap (apps/flutter3d_modeler/lib/src/ transform_modal.dart) is (0.23 / 0.1).round() * 0.1, which is 0.2.
Releasing runs TransformElements(Matrix4.translation(Vector3(0, 0.2, 0)))
against whatever the extrude just left selected — no second selection
needed, since a mesh command's own selection carries over to the next one.
The status line reads "move — object 1, faces 61, …, 72".
4. Loop cut the belly
Edge select, and pick one of the vertical edges running up the belly — the
one between the third and fourth rings from the base. Ctrl+R previews a
ring cutting across every quad that edge touches; clicking commits it.
LoopCut(cuts: 1, factor: 0.5) answers "cut a loop — object 1, vertexs
108, 109, …, 119" — twelve new vertices, one per segment, sitting exactly
halfway along the ring the edge ran through. (The panel really does say
"vertexs" — that is this build's own status-line wording, not a typo on
this page.)
(No bevel step here, on purpose. The plan for this case names extrude,
loop cut and bevel; a BevelEdges command now exists and the app's own
tools panel has a real Bevel button (tut-04), but this case's own
scenario and fixtures were not extended to exercise it — that is a
separate, tutorial-content change for a later pass.)
5. The last-operation card
Right after any edit, the panel below the viewport shows a card for it —
the extrude's own distance, as a number you can still drag. This is
ModelHistory.amend: dragging the card's slider from 0.04 m to 0.09 m
re-runs the extrude against the mesh as it was before the original 0.04 m
step, landing the rim where a fresh 0.09 m extrude would — not 0.13 m
further out, which is what a second run would give.
tutorial_scenarios_test.dart's own case-2 group checks exactly this: an
amended extrude reaches the same vertex positions as a session built fresh
with the amended distance, and the mesh gains no extra faces. It also checks
tut-03, closed: ModelSession.amend calls through to the same
ModelHistory.amend the app's own card calls directly, so an agent over MCP
can drag this same slider, and it records the adjusted command to the
session's own recovery journal — a .jsonl written after this drag says
"distance":0.09, the value the document actually holds, and a cold replay
of a journal ending on an amend like this one lands on that same adjusted
state.
6. Mirror and array
Two modifiers, added from the modifier stack panel:
- Mirror, across the plane whose normal is the vertical axis's own
perpendicular —
AddModifier(id: 1, modifier: MirrorModifier(normal: (1, 0, 0), mergeDistance: 0.0005)). On a body of revolution this is a quiet operation — the lathe is already symmetric about its own axis, so a mirror across a plane through that axis changes nothing you can see — but it is the same command a later, less symmetric edit (a single handle, say) would actually need, and the panel and the command both behave the same way regardless of what shape is under them. - Array, three copies spaced along X —
AddModifier(id: 1, modifier: ArrayModifier(count: 3, offset: (0.9, 0, 0)))— turning one vase into a shelf of three.
Both answer "add a modifier", and the panel lists two rows under "vase" afterward.
The effect is live. Add either modifier and the viewport updates —
SceneSyncreadsModelObject.modifiersnow, evaluating the stack throughModifierEvaluationCacheand re-uploading whenever it changes, the same as it already did for a mesh edit. The headlessrender/renderSheettools read it too, through the samerenderProjectthis page's own pictures come from. This used to betut-06, logged indoc/modeler-tutorial-gaps.mdas the most consequential finding writing this case turned up — a modifier stack nothing could show anywhere but Apply's own one-way bake. It is closed: the two pictures below are both ordinaryrenderProjectcalls against this case's own project data, no hand-evaluation involved.
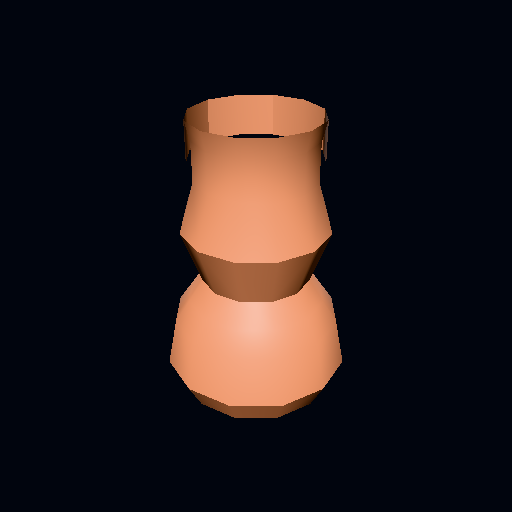
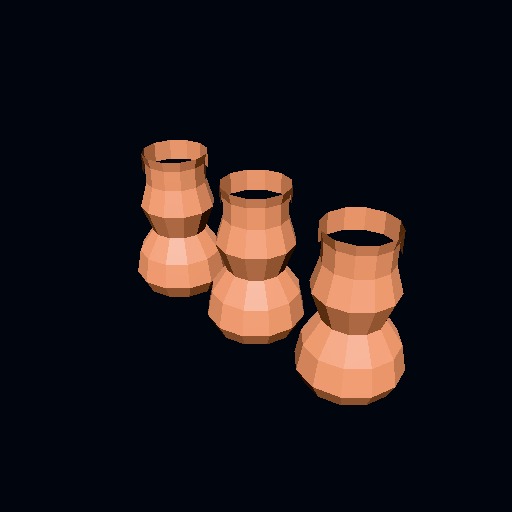
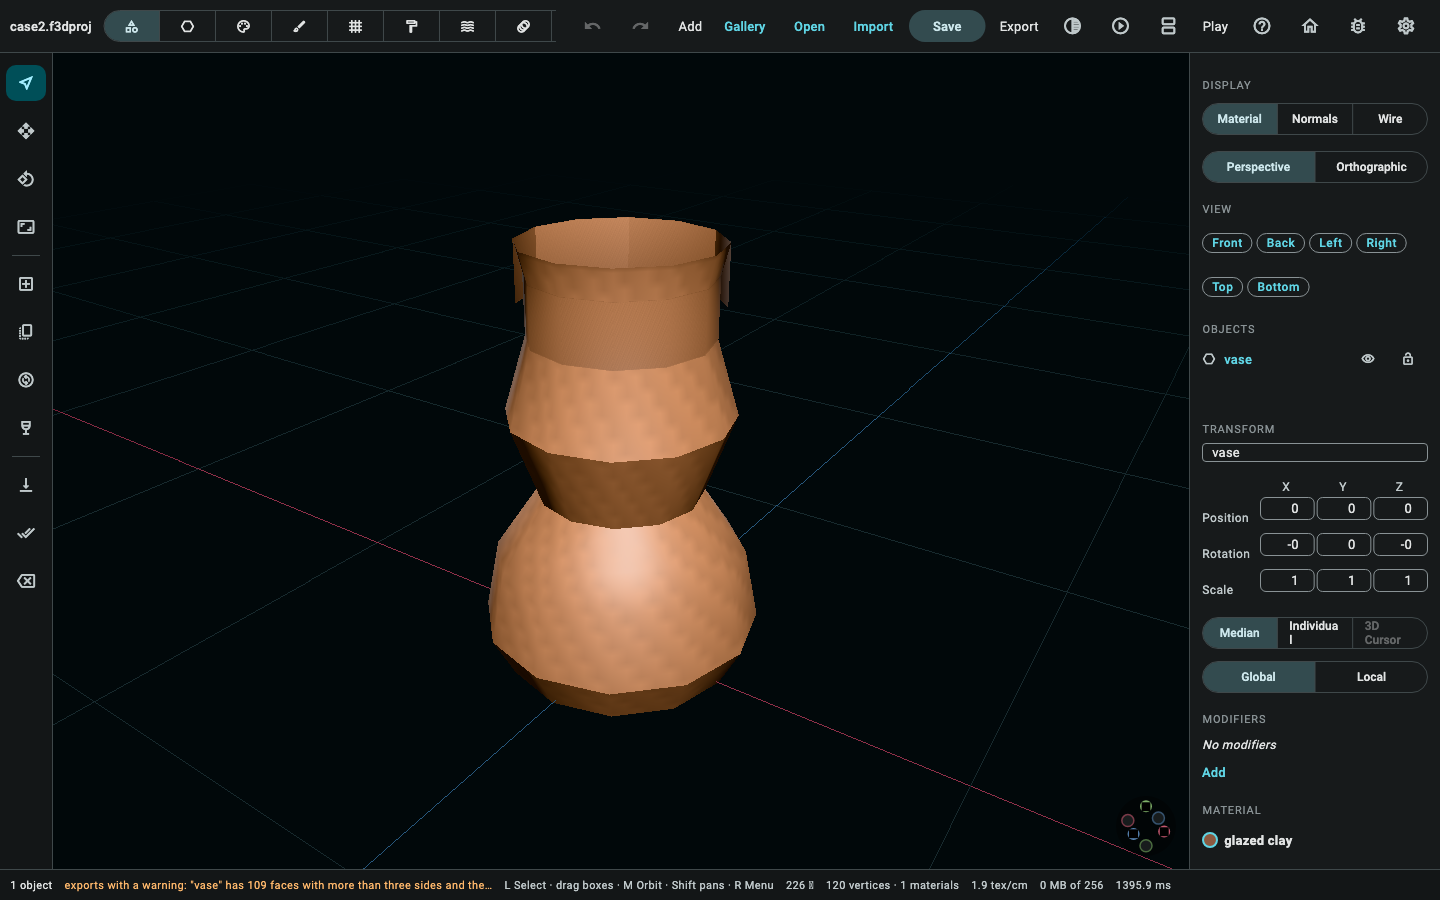
Both are real renders of this case's own project data, through the same
CPU renderer render/renderSheet use — the first is the modifier panel
with both rows unchecked, the second is what you actually get with them
on, which is also what "File → Save" below writes to disk.
7. Material and texture
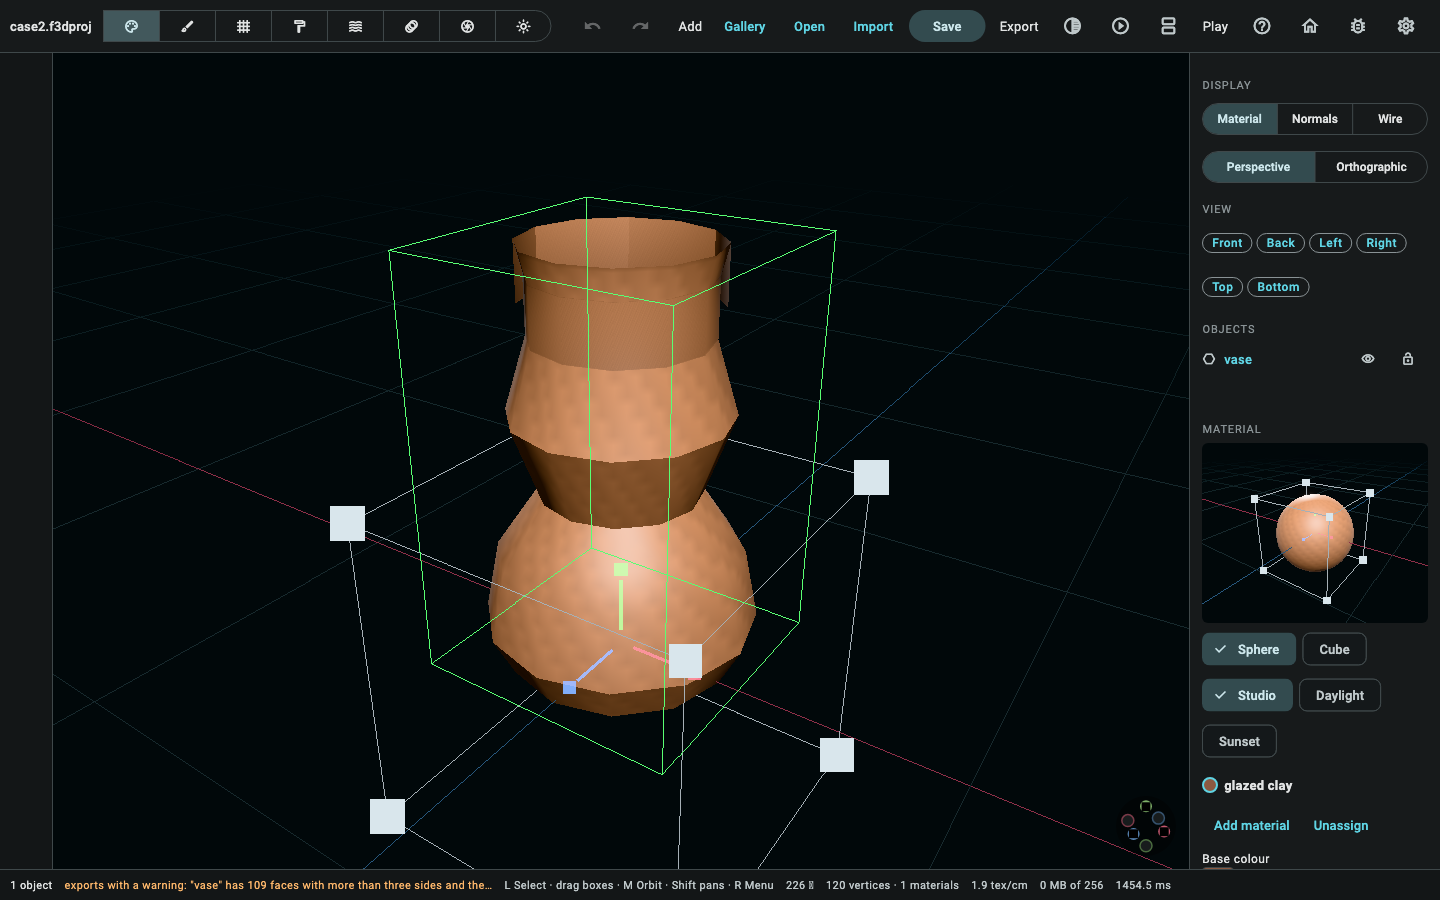
One material, glazed clay: base colour a warm terracotta (0.55, 0.35, 0.25), metallic 0, roughness 0.55 — duller than case 1's ceramic
glaze, closer to an unglazed or lightly-glazed stoneware. Assigned to the
vase, then a texture: an image added to the project and pointed at the
material's albedo slot (SetTexture(materialIndex: 0, slot: "albedo", imageIndex: 0)), answering "set the albedo texture — …".
8. Save
File → Save writes a .f3dproj — no export in this case, since there
is nothing outside this project to check it against and the plan does not
ask for one. The mirror and the array modifiers save as a live, editable
stack on the vase, exactly as added; nothing here bakes them.
Notes on this page
Time to complete: not recorded yet. TODO: a person should walk this
case by hand on a real machine and fill in a line here — "n minutes,
date, machine" — the way rel-09's own cohort rows do. Nothing in this
session could actually run the desktop app, so no time is claimed.
Screenshots. Every picture of the editor on this page is real, taken
from the running application over case 2's own saved document: the profile
editor, the mesh-editing toolbar, the last-operation card, the modifier
stack and the material panel. They are
taken headlessly rather than by hand —
apps/flutter3d_modeler/test/tutorial_case_screenshots_test.dart drives the
real editor under the software rasteriser and photographs the window — so
they are goldens: a run says whether a panel has moved since, and one
command regenerates every page's pictures at once.
(cd apps/flutter3d_modeler && flutter test \
            test/tutorial_screenshots_test.dart \
            test/tutorial_case_screenshots_test.dart --update-goldens)
          dart run tool/publish_modeler_screenshots.dart
The profile editor is the Lathe dialog as it opens, with the curve it starts from and the live preview of what turning it makes — which is what the step above describes before anything is dragged.
Proving it. packages/flutter3d_model_mcp/test/fixtures/tutorial/ case2_scenario.dart builds exactly the project this page describes,
against a live ModelSession — session.select then session.run, the
same two calls an agent over MCP or a person clicking through the app
would make. tutorial_scenarios_test.dart's own case-2 group checks four
things: the scenario reaches the exact project committed as
case2.f3dproj, byte for byte; the modifier stack holds a mirror and an
array as described; the operation card's amend really does adjust one
step rather than leaving two; and — the case's own biggest finding, once —
case2.jsonl, replayed through CommandJournal.replay from a cold empty
project with no live session behind it, used to get stuck at the very
first extrude for want of a selection nothing in this journal format
recorded. That was tut-05: session.select now runs a real, if
non-mutating, SelectElements command through ModelHistory.run rather
than assigning the selection directly, so the two picks this page's own
rim extrude and belly loop cut depend on are on the journal too — a cold
replay of case2.jsonl now rebuilds this case's own fixture with no live
session behind it at all, the same promise case 1's own journal keeps.
Driving it live is still what
dart test test/tutorial_scenarios_test.dart actually does; the cold
replay is now one more thing it checks, not a documented gap.
No GLB export. Unlike case 1, this case ends at the .f3dproj — there
is no external file to compare an export against, and the plan does not
ask this case to produce one.